Altering your bra cup to fit a smaller wire (aka the omega alteration) - a more accurate way
 |
| The standard omega adjustment |
An extended version of this post is available now on my ko-fi to read for just $3/£2. You can also choose to subscribe monthly for future access to extended posts, extra content, and to support my work.
 |
| My version of the adjustment |
The main drawback of my method is that while it ends up with a well-shaped cup (after some upper cup adjustments), it does take considerably more time to perform than the traditional alteration. If you are struggling to find your cup volume it may be worth using a simpler alteration method first and then moving to this one after the correct volume has been found.
Geometric Issues with the Traditional Wireline Alteration Methods
Since publishing my previous blog post "Why the omega alteration keeps messing up your armpit", I have expanded and changed my opinions on this alteration's flaws, so here's the lowdown of my current beliefs and experiences:
Issue 0: Confusion around intended shape - Omega vs Projected
So this is partially a terminology thing and partially a thing with the alteration. Omega shaping refers to a cup that widens around the wire - like a capital Omega (Ω). This widening happens in three dimensions, so it includes tissue sitting below the wire when viewed from the side. In my experience, people who need a truly omega shaped bra are very rare, and this shape is not an inherent breast shape (despite what your boobs might look like leaning forwards - due to gravity most large breasts appear omega in this position), but it is instead a compromise needed for very large, heavy breasts (UK JJ+) where full support is not comfortable or maintainable when wearing a bra.
On the other hand, needing a different wire size to the one given is very common. You (probably) don't need an actually omega shaped bra, just one with more cup volume for a given wire size. Looking from above, this is the difference between a Ω and a ∩. This is not just pointless complaining about terminology - this distinction has an impact on the alteration itself.
 |
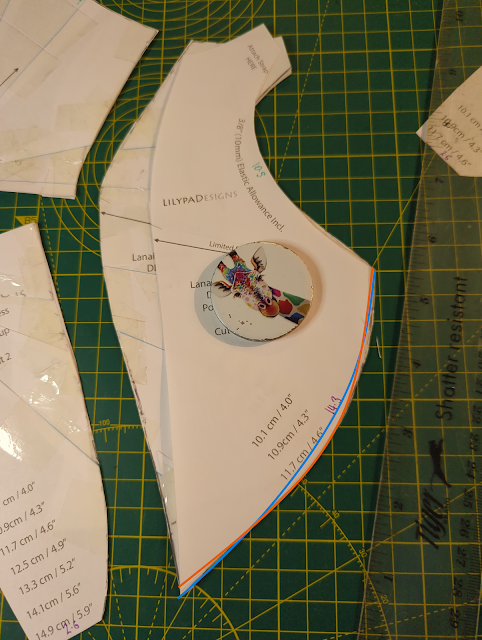
| An omega shape (orange) as compared to a standard projected shape (blue). |
The standard "omega" alteration does almost produce a bra that has an omega shape, but not quite (changes to the wireline shaping are needed, as well as ones to the neckline). However, as most people don't need an omega shaped bra, these omega shaping results cause hassle and reduced lift. For the people who do need omega shaped bras, there are further steps that should be taken to get that shape.
Issue 1: Neckline Adjustments Not Included
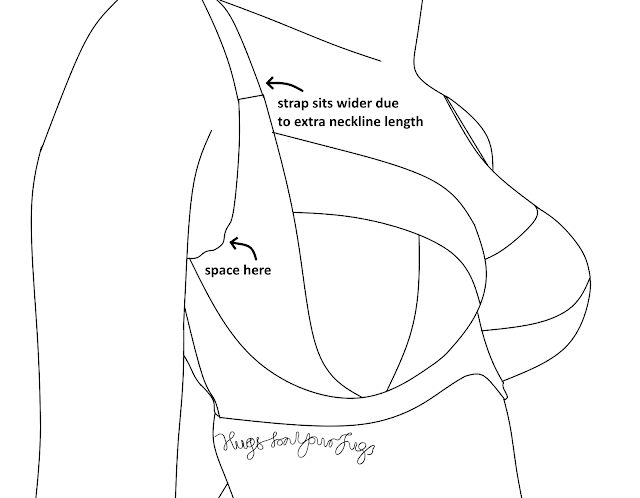
It stands to reason that, like the wireline, the neckline of a bra cup should also be altered (shortened) when moving to a smaller wireline, to account for the narrowed distance between the wire tips. This is something I touched on in my previous post: the long and short of it is that you can often end up with a lot of extra space in the armpit and upper cup after performing the standard alteration, as it does not do anything to the neckline.
 |
Issue 2: Wireline Seam Truing/Wireline Shape
A big issue with standard wireline alterations is they leave users with dents in their wireline that are hard to true.
Standard methods of adjusting for wireline length also don't take into account that the shape of the wireline is related to the projection of the cup, and as the cup projection changes the shape of the wireline must itself change to ensure the cup projects properly from the wire when worn.
Issue 3: Seams that Don't Pass Through the Apex
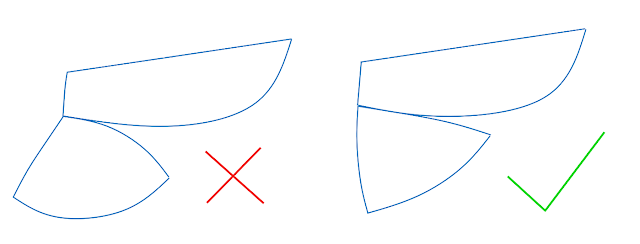
Most seams in a bra pass through the apex. Power bars are a notable exception, and are the focus of this post, but there are other cases too such as the seams in a three-part half cup bra. When performing the traditional omega alteration for a bra with a power bar, the lengths of matching seams change at different rates and end up different lengths. In addition to this, changes to the shaping of these pieces can cause excess fullness in the lower outer cup.
Note: in my previous post about this alteration, I talked a bit about horizontal fullness distribution. My opinion about this has changed a lot since publishing, and I no longer believe that to be a cause of fit issues in most users of the standard omega alteration.
Wireline Length Alteration Tutorial
Step 1 - Reference wireline lengths
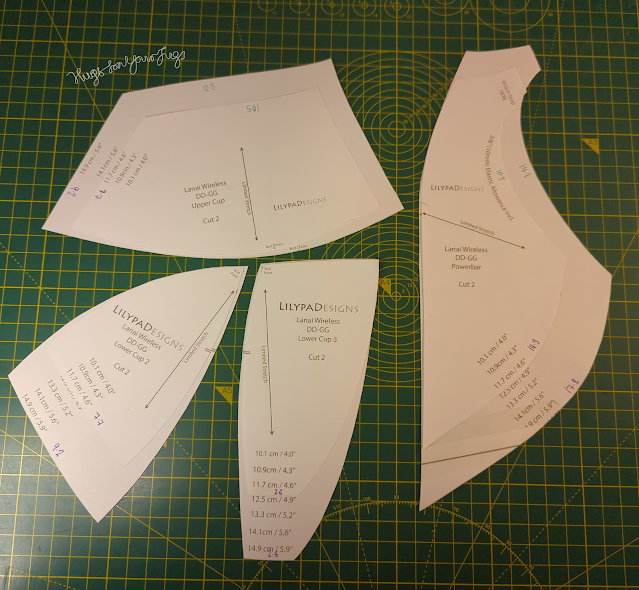
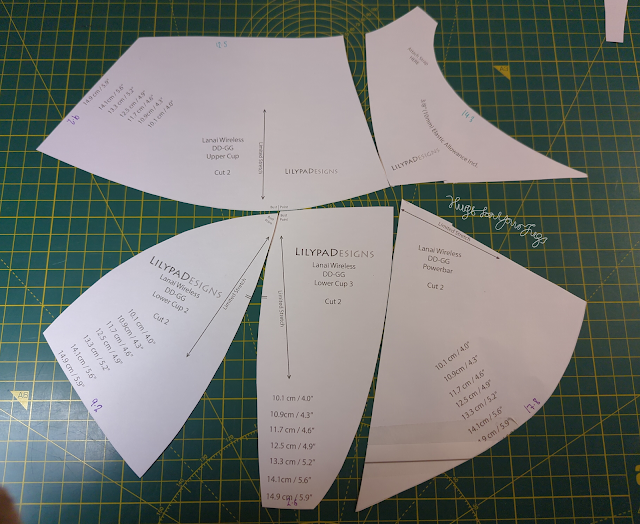
Find the cup size that correlates to the cradle size for your chosen wire, and measure the wireline and neckline lengths for each piece of the cup. This includes the underarm region (between the wire and the strap attachment).
 |
| Here
I am reducing the wireline of this 5.9" cup to that of the 4.6" cup, so
I printed out both sizes and measured the wireline and neckline lengths
of both. |
If you don't have a reference size for this, feel free to use my handy calculator to keep the wireline lengths proportionally the same. This calculator takes the number of seams you have on the wireline, the lengths of the wireline seams on the cup you want to wear, and the cradle length you want to adjust it to. Then it calculates a reduction based on this new cradle length while keeping the wireline seams in proportion with each other. It also uses the difference in cradle length to adjust the neckline proportionally - bearing in mind the cup coverage (more on that below).
Step 1.5 - Determining Neckline Reduction
The neckline cannot be reduced as much as the wireline in almost all bras, because the neckline sits away from the body. Imagine a half cup bra where you have tightened up the neckline to fit a small wire! It just wouldn't work. The neckline needs to be somewhere between its original length and the length of the wireline reference piece.
My original neckline lengths were 12.5 and 14.3 cm, and the reference lengths were 10.5 and 10.5cm. Since this bra is about 95% coverage on me, I want to reduce my neckline lengths considerably but not all the way.
My calculator makes this adjustment automatically (although its algorithm is not very well tested). If you don't want to use the calculator, here is the logic it follows:
For my paper example, I decided to use the reference wireline lengths for the wireline region of the cups, and the calculator for the neckline region. As the calculator uses the cradle length change as reference rather than the old neckline length, the results are slightly different to the ones calculated above. After filling in the green boxes, here is what the calculator gave me:
I rounded these values to 10.6 and 12.1.
Step 2: Lay out your pattern pieces
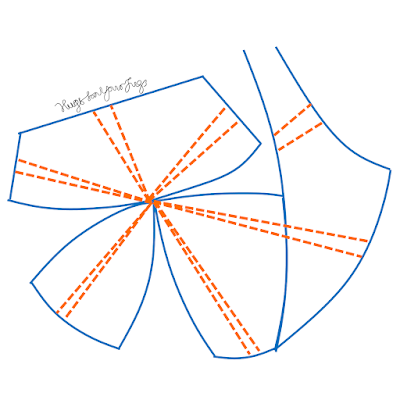
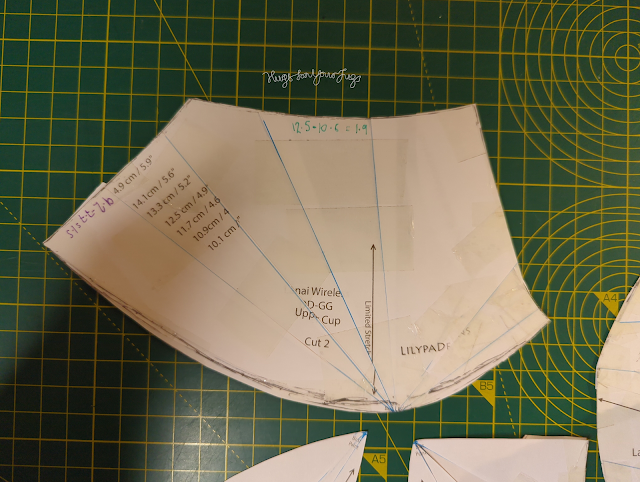
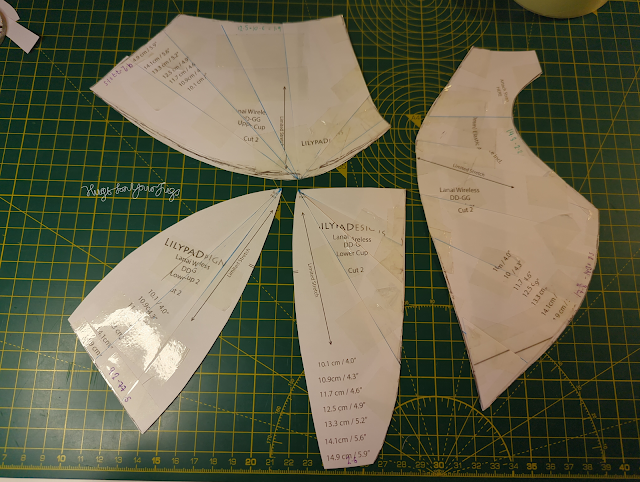
For your chosen cup volume, lay out your pattern pieces so that they are aligned around the apex. It is often helpful to cut your power bar in half, placing one part with the upper cup and one part with the lower. I recommend cutting off the seam allowances as they will only get in the way.
Note: it's often easiest to put the apex where the seams meet even if it's not the true apex of the bra. Since bra cups are rounded near the apex, having the working position slightly off does not have much impact.
Step 3: Draw lines from apex to wireline
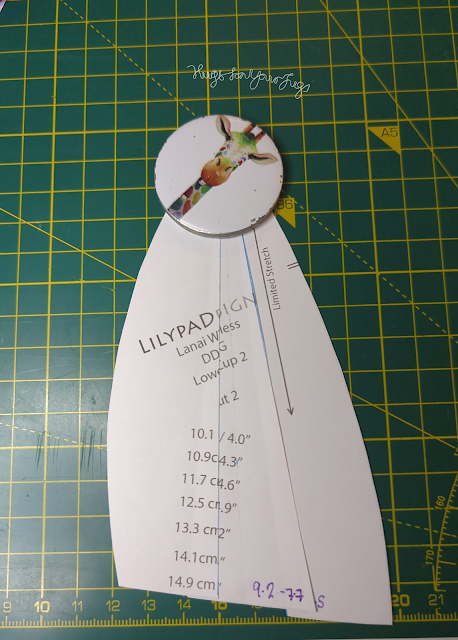
For each piece that will be reduced, draw one or multiple lines from the apex to the wireline and neckline, spreading them out as evenly as possible while keeping in mind the intended reduction. I do about 1 line per cm of reduction.
For pieces like power bars, draw the line from the apex to the edge of the innermost piece. Then align the power bar with the piece at the point of the line, and continue the straight line through to the wireline.
Do the same thing for the neckline.
Step 4: Darting/Wedging
Cut along these lines and dart or wedge your pattern pieces so that your wireline length matches that of your reference wireline.
For power bar pieces, I've found it's best to temporarily tape the pieces together, cut, then cut through the tape to separate again before moving to the next line.
As for the neckline, do the same thing but for the adjusted new lengths.
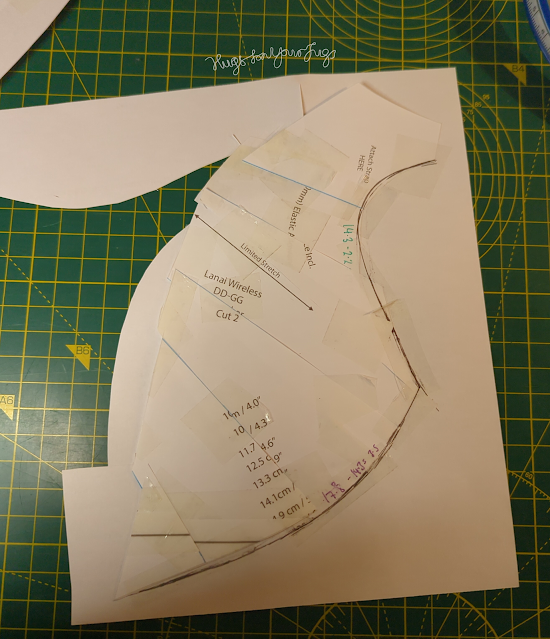
Step 6: Smoothing Seamlines
Step 7: Reducing pointiness/correcting upper cup
The upper tips of bra wires are straight, not based on a circle, which makes the upper part of a bra cup fundamentally different in geometry to the lower cup. When performing this alteration, as we treat the upper cup like a cone we can end up with quite a pointy shape, and when widening the upper cup can end up with a shape that dips down below the apex. So we need to fix this by smoothing out the upper cup curve.
When expanding the wireline/neckline you can get a kind of "w" shape to the upper cup, where the cup curves come below the apex. This also needs to be smoothed out - the important thing is maintaining the seam's overall length as best as you can, the cup piece may need to be extended/reduced near the wireline to make this shape work.
In the extended version of this post, I talk about a different way of reducing the neckline that avoids the pointiness. I have not tested it, which is why it's not in the main post.
Step 8: Adding Seam Allowances
Add your seam allowances back to the pieces (not pictured). You're finally done!
In the extended version of this post, you can read about a different method of altering the neckline which should avoid the pointiness. Read it now! Thank you to all my ko-fi supporters <3







Thanks for the detailed analysis. I'm not an omega bust. Rather than being narrow across the base of the horizontal measurement against the chest wall, I'm wide in that dimension but narrow across the vertical dimension on the chest wall. My vertical chest wall measures 4" from high bust to underbust, rather than the standard 6". I need to shorten even short wires by ½" - 1". But I need the volume of a taller wire.
ReplyDeleteSo I'm still projected, but from vertical squish rather than horizontal squish.
I'm hoping your analysis will give me ideas about adjusting for my shape, as the short but protected bust gets less attention than the omega bust.
Hi Karey
DeleteWhile issues with cup height can be something that needs to be managed, there's a couple of thoughts that I want to throw at you. I personally don't use distance from high bust to underbust in my patternmaking because it's almost entirely dependent on your armpits rather than anything to do with your breasts. Additionally, needing to shorten your wires often comes from not using enough spring which not only leaves the wire tips sitting high but can also cause significant discomfort.
If these things don't apply to you, then here's what I would focus on if I were making this adjustment
1 - pay attention to apex height and lower it for both the lower and upper cups if needed. I show how to do this on my BCD vs HH post.
2 - lower the strap attachment as necessary
3 - keep an eye on the upper cup shape. A squareish shape to the upper cup can mean that the apex is too low. Additionally, a shape with a more convex/ski slope curve to the upper breast can be a sign that the bra has too much projection and a smaller size is needed
I hope this helps